So I Decided to Generate Some String Art
programming, rust, string art
Intro
Heads up! I'm going to give some code here, but not a working implementation. Consider this post inspiration. View the full code on GitHub.
I saw a picture of some string art on Reddit a while back. I had no idea how it was done, but it looked really neat. Later I found a YouTube video where the creator explains how she created the image. The pictures looked nice and the programming seemed fun, especially as a way to practice some Rust. So I decided to generate some string art.
The video explains how to generate art at a high level, but I wanted more details. I found an academic article that details the process they used. I had a hard time understanding parts of it, but the general gist of their process is:
- Process the image
- Place the pins
- Enumerate all possible threads between different pairs of pins
- Score the threads somehow
- Pick the best thread
- Continue Scoring and Picking threads until...the image is good?
Oh, and I think there was a step where they removed lines that had been added earlier but had stopped contributing to the image's "score" because of other more newly added lines. As I said, I had a hard time understanding parts of it. However, that outline was the main thing I wanted from the article.
(Also, I enjoyed the pictures, especially of the physically produced string art pieces. I won't have any of those for you in this post, so if you want physical pictures I recommend that paper or the work of Petros Vrellis, who first started making computational string art.)
Code Overview
First off, I used the image crate to deal with images.
# Cargo.toml
[dependencies]
image = "0.23"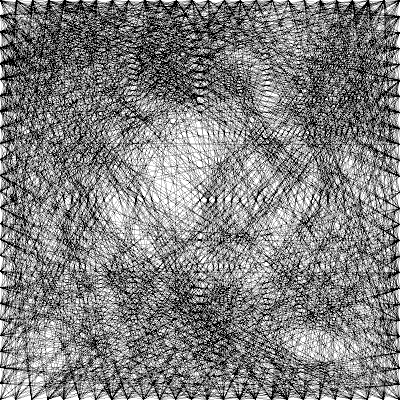
Second, I made a PixLine struct that can iterate through all the pixels (with location and
color1) spanned by two points.
pub struct PixLine(HashMap<Point, RGB>);

pub struct Point {
    pub x: u32,
    pub y: u32,
}

pub struct RGB {
    pub r: i64,
    pub g: i64,
    pub b: i64,
}
Third, I needed a struct to keep track of the string art image and "score" the image quickly. I
called it RefImage. The RefImage struct can calculate the change in score either when adding or
removing a PixLine from the image. It can also actually add and remove lines from itself.
pub struct RefImage(Vec<Vec<RGB>>);

impl RefImage {
    pub fn score(&self) -> i64;
    pub fn score_change_if_added<T: Into<PixLine>>(&self, line: T) -> i64;
    pub fn score_change_if_removed<T: Into<PixLine>>(&self, line: T) -> i64;
    pub fn add_line<T: Into<PixLine>>(&mut self, line: T) -> &mut Self;
    pub fn remove_line<T: Into<PixLine>>(&mut self, line: T) -> &mut Self;
}
And with that here's the process I settled on for generating string art.
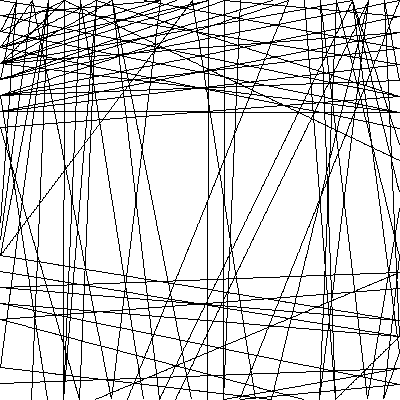
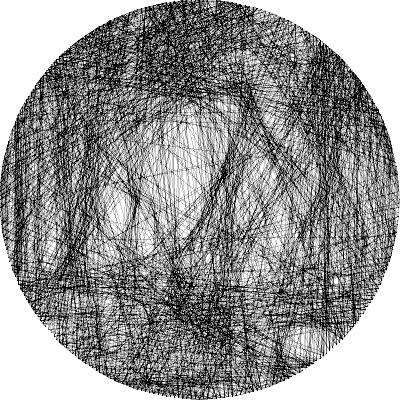
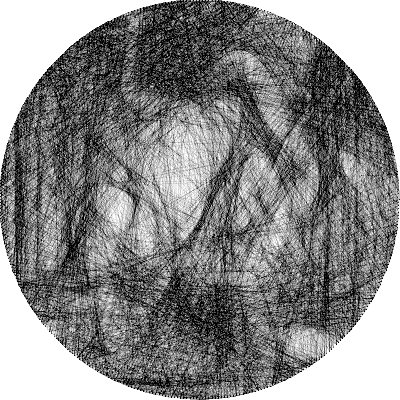
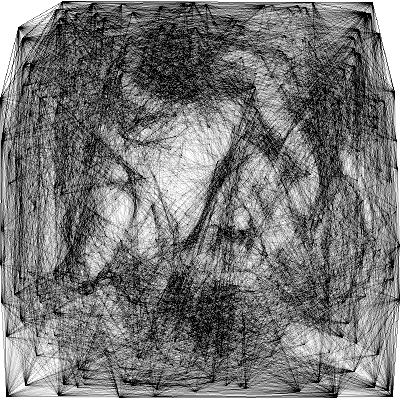
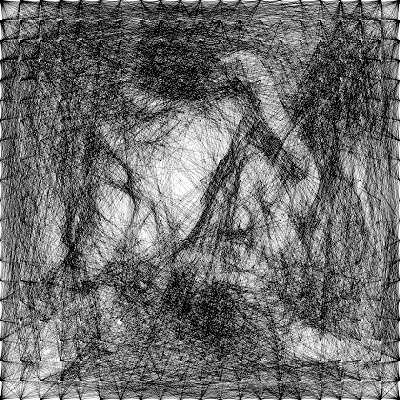
- Process the image: I mostly do this manually. I find a photo, make it grayscale, and then adjust the contrast until it seems about right (which often takes multiple tries).
- Place the pins: I started out placing the pins on the image's
perimeter. Later I added options for placing the pins in acircle, in agrid, or scattered in an evenlyrandomdistribution. - Enumerate all possible threads between different pairs of pins: Easy enough with a couple of
loops. I used the
rayoncrate to parallelize things. - Score the threads somehow: I used least squares. See the next section for details.
- Pick the best thread: Easy enough with
min_by_key(minsince we want to golf our score). - (New step): Score the already chosen threads, and remove those that have become detrimental.
- Continue picking and removing threads: Until no possible addition or removal of a string improves the image's score.
Scoring
When scoring, the RefImage is thought of as a "hole" that needs filling. The RefImage starts out
as a negated copy of the original image---negated meaning each pixel's RGB values have been made
negative, i.e. a white pixel RGB { r: 255, g: 255, b: 255 } has been transformed into
RGB { r: -255, g: -255, b: -255 }. The program then adds in white strings to "fill in" the
negative hole and try to approximate a "level ground" of 0 for each pixel's RGB values.
The score of the RefImage is calculated as the sum of squares of each pixel's RGB values, giving
the sum of squares of the differences from the level ground of 0. This means lower is better, and a
"perfect" score of 0 would correspond to a completely black image.
fn pixel_score(RGB { r, g, b }: &RGB) -> i64 {
    r * r + g * g + b * b
}

impl RefImage {
    pub fn score(&self) -> i64 {
        self.0.iter().flatten().map(pixel_score).sum()
    }
}
For black-on-white images, the image and string colors need to be inverted in the beginning, and then the process is identical. When finishing, the outputted string image also needs to be inverted to get back to the desired black-on-white image.
An important detail is that the RGB "pixels" hold i64s instead of u8s. Otherwise this idea of
the RefImage as a "hole" that needs filling wouldn't be possible.
When a string is chosen, add that line to the RefImage so that the score goes down. To add a
white PixLine to the RefImage (which assumes a black background), iterate through each pixel in
the PixLine and add its RGB color to the corresponding pixel in the RefImage. And that's it.
impl<T: Into<PixLine>> std::ops::AddAssign<T> for RefImage {
    fn add_assign(&mut self, pix_line: T) {
        pix_line.into().into_iter().for_each(|(point, rgb)| {
            self[point] = self[point] + rgb;
        })
    }
}
Now when we have a white pixel (well, negated white) in the RefImage and add a white string to
it, we do something like:
RGB { r: -255, g: -255, b: -255 } + RGB { r: 255, g: 255, b: 255 };
// -> RGB { r: 0, g: 0, b: 0 } -- Perfect Score!
Which comes out to a black pixel, which is our "perfect," so now our scoring algorithm knows that this pixel has been sufficiently represented by our chosen strings.
Scoring Threads
The score_change_if_added for a PixLine is the same as the score of a RefImage after adding
the PixLine minus the score of the RefImage before adding the same PixLine. However, this
difference can be calculated more cheaply by only considering the change in the scores of the pixels
that the PixLine covers (all the other pixels stay the same, so they don't contribute to the score
change).
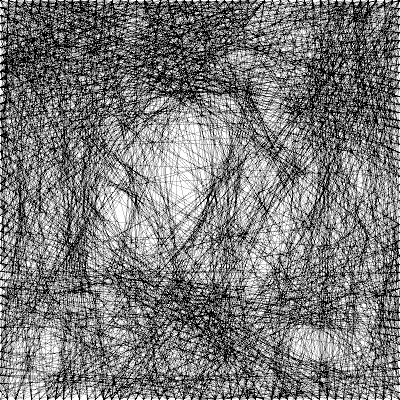
Picking Threads
Once all the candidate threads are scored, it's time to start picking them and adding them to the
RefImage.
The naive method I started with was to generate the entire collection of possible threads to add, score them, pick the one with the highest score, and then repeat until no thread was a benefit to the image's score. Then I would similarly look at all threads present, evaluate their "removal" score, remove the worst offender, and repeat until all threads were beneficial. And bounce back and forth adding and removing until neither process could do anything to improve the image.
This process results in well-chosen strings, but it is very slow. To speed things up, I decided to batch things. This sacrifices a small amount of accuracy for a great increase in speed.
By batching I mean: When adding threads, generate the entire collection of threads, score them
(which is the slow part), and then pick the best n strings, where n is some parameter that
starts high and slowly lowers throughout the string art generation process (similar to the
"temperature" parameter in simulated annealing). The predicted score changes won't exactly equal
the actual score change, because the predicted score changes don't take into account the other
chosen strings, which is why accuracy is sacrificed.
Batching can also be applied to the removal process, but it's not as beneficial here because the
pool of strings that can be removed is generally much smaller than the pool of strings that can be
added. I did implement batching for removal, but I scaled down my n for removal by a factor of
10. This way removing strings happens a bit faster, but it is still relatively more accurate than
adding strings.2
Conclusion
I've had a lot of fun with this. Some other things I've done:
- I used the
clapcrate for CLI argument parsing - I implementing black-on-white & white-on-black modes
- I implemented the algorithm in color (although the strings don't occlude one another, they just add their RGB values)
- I made a simple auto-color-picker mode, to select the string colors for me
- I generated a bunch of images of eggs from the game Egg, Inc.
- I played with the adjustable variables a bunch: number of pins, placement of pins, transparency/thickness of the string, and accuracy of string path calculation.
- I added an option to generate gifs of the creation process

Footnotes
-
RGBis slightly excessive for grayscale photos, but starting with it will make things simpler if you want to eventually implement this for colored string art stuff. Also, usingi64instead ofu8makes implementing scoring a bit easier. ↩ -
I found that when I used the same
nfactor for addition and removal (so that both processes were similarly inaccurate), there was a lot of "bouncing": the addition process would add too many strings, so the removal process would over-correct and remove too many strings, so the addition process would add most of them back, etc. By making the removal process more accurate this "bouncing" effect was reduced. ↩